Earlier today, I created an internal “Call for testing” post where I essentially asked other Automatticians to break a piece of functionality that I intend to launch.
To help with the testing process, I included a link to a pre-filled Github issue. For the most part, pre-filling the issue with a label, milestone, etc. was pretty easy, but there were a few gotchas.
So, below I’ll break down how to prefill as much of the Github issue form as possible.
Creating issues
First of all, you should know that to create an issue for a repository, that you would go to a URL like:
https://github.com/{owner]/{repo_name}/issues/new
As long as you’re logged in, when you go to the above URL, you’ll be shown a form to create a new issue. And since the new issue form is in the same place for each repo, you can share this link (and even prefill it) to make life a little bit easier for those that are using and testing your software.
The secret formula
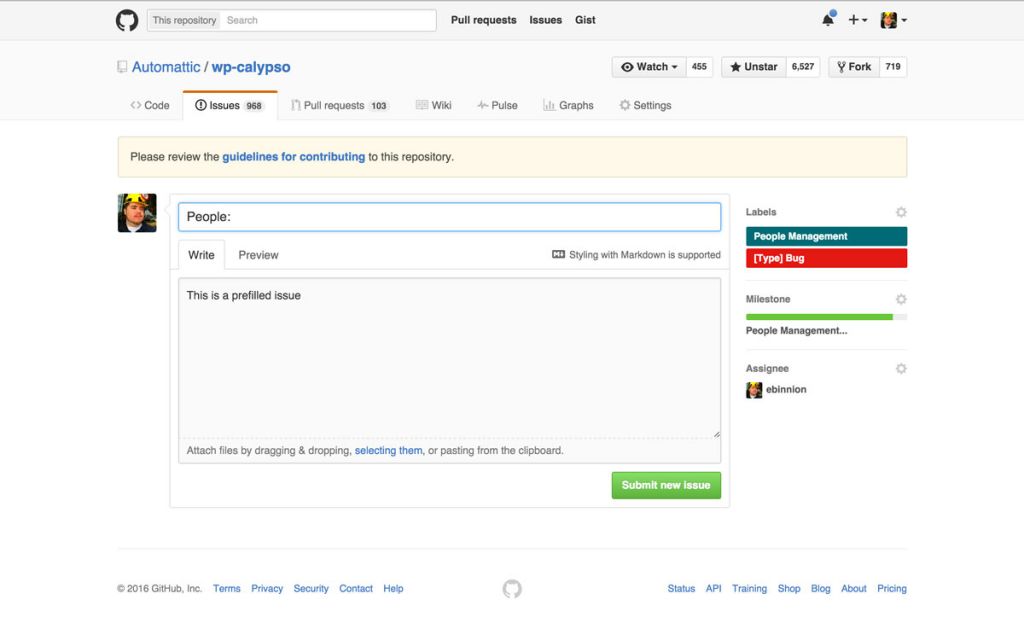
In the above screenshot, you can see that there are 5 pieces of information that can be filled out in a new Github issue. These are:
- Title
- Description
- Labels
- Milestone
- Assignee
Now, to prefill these all we need to do is add parameters to the query string. Here’s an example:
Note that the values in the URL above are also URL encoded.
Gotchas
In the above link note that there is no &description. That’s because Github fills the description with whatever is in the &body parameter.
Lastly, note the use of labels[]= when assigning multiple labels. If you want to just add one label, you should be able to just do labels=.
Leave a Reply